
Table of Content
Part 1: Introduction to SSDs and How they Work
A Solid-state drive or SSD is Windows and Mac systems’ most advanced storage device. The data saved in any SSD is typically saved inside an integrated circuit, mainly using flash memory or secondary memory, which speeds up the process of data writing, transfer, and erasing.
SSDs, as compared to traditional Hard Drives, are solid, without any moving parts, thereby making them faster, more resilient, and a lot quieter. Not to mention, they come with a pretty heavy price tag.
Why do SSDs become Unallocated?
SSDs are no different from any other storage device. So, facing issues, errors, and problems is not at all an uncommon issue. But one of the most dreaded issues is when you find your SSD drive has become unallocated. If you use your SSD or any other storage device for the first time, they usually show unallocated space. But if you have been using your SSD for a long time and saved your data, all of a sudden, the drive starts displaying unallocated space. This article has all the answers you need. But before we get started, let’s quickly explore why your SSD was labelled as unallocated.
Reasons Why SSDs Show Unallocated Space?
- Using a brand new SSD that is uninitialized
- Outdated driver
- Internal device error
- Using faulty SSD
- File System getting corrupt
- Hardware Failure
- Components of SSD getting damaged
- Improper drive ejection
- Virus or Malware attack
- Missing or accidentally deleting partition table
- Deleting or losing some of the partition volumes
- Accumulation of Bad Sectors on the Solid-state drive
- Partitioning error
- Software corruption
- Issue during cloning
- Formatting the SSD with a file system with a new or unsupported file system
These are some of the most common reasons your SSD displays unallocated space.
What are the implications of Unallocated SSDs?
The two most common implications that the users face after their SSD becomes unallocated are:
- Reduced storage space, and
- Data loss.
Part 2: How To Identify Unallocated Space on SSDs?
Method 1: Disk Management
Disk Management is a pre-installed tool in Windows systems that allows users to manage internal and external storage drives. This tool allows users to create, delete, format, resize the existing partitions, and change drive letters.
- Open Disk Management.
- In the Disk Management window, find the SSD drive showing unallocated space. It will usually be displayed as a black bar with no drive letter.
Now that you have identified the unallocated space on your SSD. It’s time to start fixing the unallocated space on the SSD.
Part 3: Troubleshooting Unallocated SSD
Let’s start with the most accessible solutions to fix the unallocated disk partition issue.
Method 1: Run Anti-Virus
Virus or malware attacks are sometimes responsible for making the space or partitions on your Solid-state drives unallocated. It’s essential to make sure this isn’t the reason. You can run a quick scan using any Anti-virus to eliminate viruses or malware that might have infected your disk.
Method 2: Assigning Drive Letters
Assigning the drive letter is one of the most effective ways to resolve the unallocated disk space on an SSD. When an SSD or any other storage device has unallocated space, it typically means that the space is not assigned to any partition or volume, and the user can store any data. Therefore, assigning a drive letter to the unallocated space makes it accessible and allows the user to save data. As well as allowing them to create a new partition or resize any existing partitions.
Follow these steps to assign a drive letter to unallocated space on an SSD.
- Open Disk Management.
- In the Disk Management window, find the SSD drive showing unallocated space. It will usually be displayed as a black bar with no drive letter.
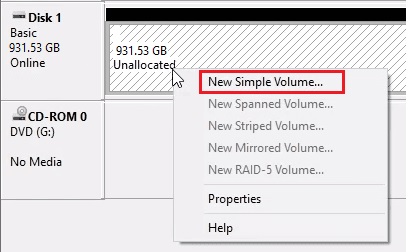
- Right-click on the unallocated space partition and select the “New Simple Volume.” In the New Simple Volume Wizard, follow the steps or prompts to create a new partition.
4: You are now required to specify the partition size, assign a drive letter, and choose a file system.
5: Click on the Finish button to start creating a new partition.
The unallocated space on the SSD will not be visible to the operating system, and the users can start using it like any other partition or drive.
Method 3: Updating Drivers
As mentioned earlier, outdated disk drivers can be one of the main reasons why some of the allocated space on your disk starts showing as unallocated. Drivers have installed software that connects and ensures smooth communication between the operating system and the hardware.
The easiest way to fix this issue is by updating the device drivers.
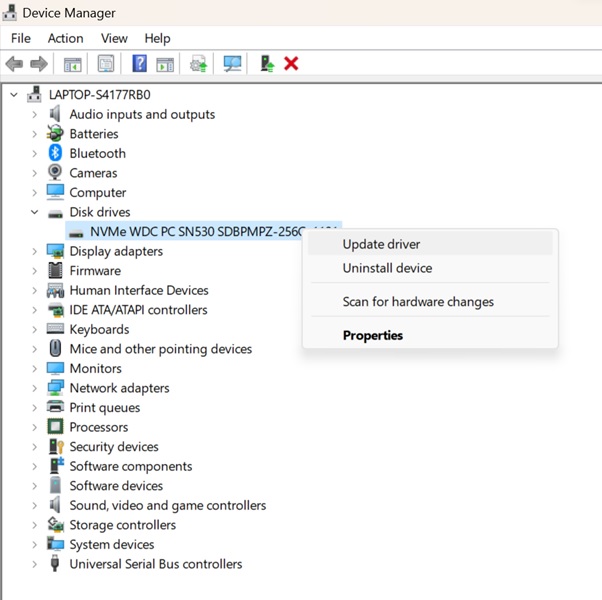
1: Start Device Manager from the start menu.
2: Click on Disk Driver and right-click on the SSD drive, and from the drop-down menu, click on Update driver.

3: Select the “Search automatically for drivers” option and follow the instructions to complete the driver updating process.
Method 4: Error Checking Tool
Windows system comes with a free error-checking tool that can quickly analyze, identify, and repair storage device errors.
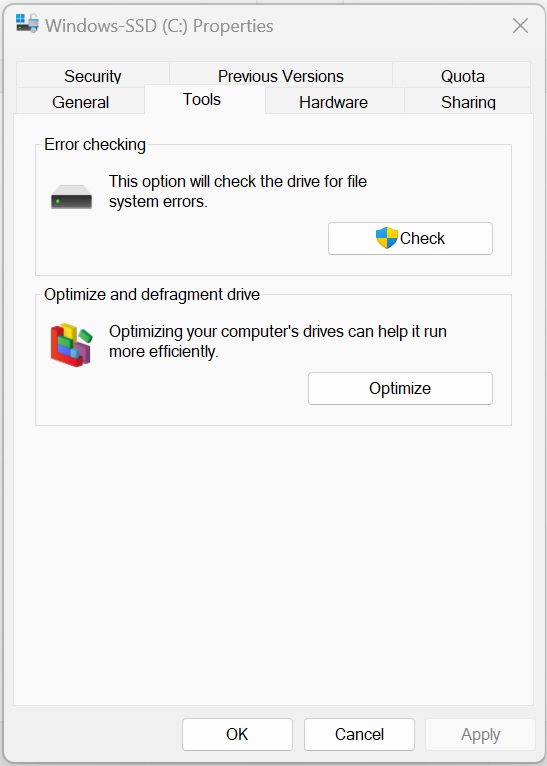
1: Open File Explorer, and from the left side pane, select the SSD drive by right-clicking on it; from the options menu, click on the Properties option, followed by the Tools tab.
2: Under the Error Checking tab, click on the check option and click on the Scan the Drive option.
3: The tool will start scanning the selected SSD.
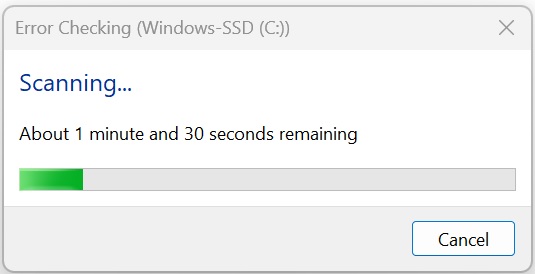
4: Once the tool is done scanning the SSD. It will display the following information.
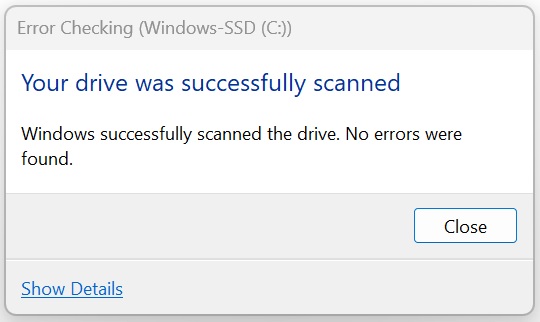
Suppose the Error-checking tool did not resolve the issue. You can format the unallocated disk space on SSD with a supported file system.
Method 5: Format the Unallocated SSD
As mentioned earlier, one of the reasons why your SSD displays unallocated space is when you format it with the unsupported file system. You can reformat the SSD with any supported or compatible file system.
- Navigate to the File Explorer and right-click on the drive, drives, or partition you want to format.
- Select the File System, Allocation Unit Size, and click the Quick Format option and click on the Start button.
Part 4: Recovering Data From Unallocated SSD?
Losing data after your SSD shows unallocated space can be inevitable. Thankfully, recovering the lost data or partitions is not.
Yodot Hard Drive Recovery Software is an award-winning data recovery software that is tried and tested by millions of users worldwide. Yodot can recover lost data from any Unallocated SSD and deleted files and folders.
Steps to recover data from Unallocated SSD
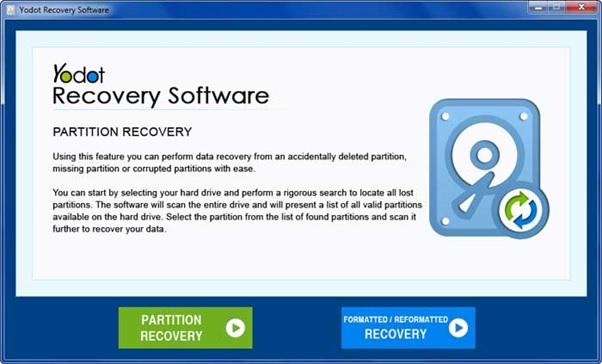
- Download and set up your system’s Yodot Hard Drive Recovery tool. Once the installation process is completed, run the tool.
- Click on the Partition Recovery option.
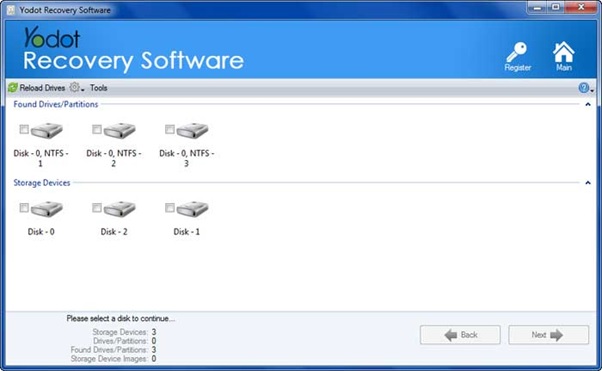
3: Select disk or the partition from which you want to recover the lost data and click the Next button.
Step 4: The tool scans the selected SSD drive and lists the recovered data on your screen.
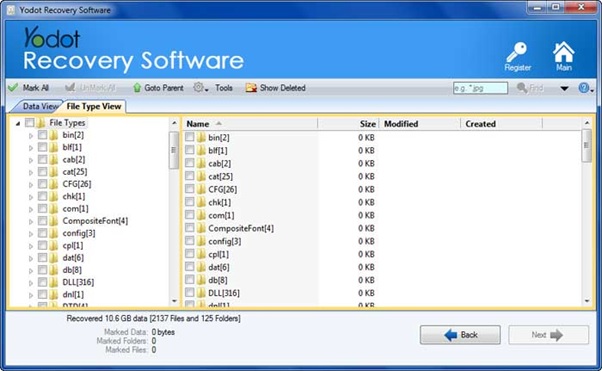
Step 5: Yodot offers users the option to preview the recovered files. Just double-click on any file to preview it.
Step 6: The last step is to select the files and folders you want to restore. Click on the Next button and select the location where you want to save the recovered files.
You have now recovered data stored in the unallocated SSD using the Yodot Hard Drive Recovery tool in six simple steps.
Part 5: Fixing Unallocated Space on SSDs
This section answers the question, “How to fix unallocated SSD?”. You can try creating a new partition or resize the existing partition on the disk drives.
Solution 1: Creating New Partitions
Suppose you have enough unallocated space on your SSD. Then, you can use that space to create a new partition. This allows you to format it with a supported file system and allow users to use it to save the data.
Steps to create new partitions on the unallocated SSDs
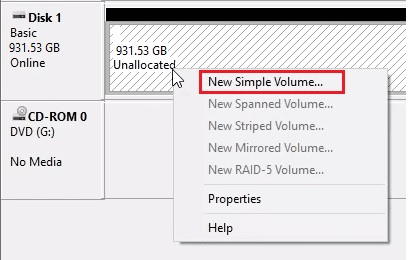
- Launch the Disk Management and locate and right-click on the unallocated disk space on the SSD. Click on the New Simple Volume option.
- In the following window, you will be asked to assign a drive letter, select the partition size, and click the Next button.
Upon completion of the process, a new partition will be created. You can start using the allocated partition to save your data. But, if the unallocated space is insufficient, you can create a new partition. You can try merging the unallocated disk space to the existing partition.
Solution 2: Resizing the Existing Partitions
The second solution to help you fix the unallocated space on the SSDs is by resizing the existing partitions or merging the unallocated disk space into an existing partition. This will help boost the partition’s capacity by removing unused or unallocated disk space. Here’s how you can increase the size of allocated partitions.
- Open the Disk Management. Right-click on the SSD drive or the partition showing unallocated space, click on the Extend Volume option and click Next.
- In the next window, you will be asked to assign the amount of volume or mention the size you want to extend.
Note: Do not enter the amount exceeding the partition capacity that will be merged. - Click on the Next option after specifying the desired size for allocation.
- Click on the Finish button to finish the partition resizing process.
Also, note that increasing the size of the partition is only possible in two scenarios:- If the file system of both partitions is the same
- The partitions are adjacent to one another.
Part 6: Tips and Tricks
You can try the following preventive measures to make sure you don’t reencounter the same issue in the future.
- Take regular backups of your essential data and save it on various external drives and the cloud.
- Perform regular disk maintenance to make sure your SSD is issue-free.
- Regularly update your drivers and other software applications.
- Always use reliable disk partitioning tools to maintain disk integrity.
- Always practise safe storage device practices such as properly removing and ejecting the storage devices, ensuring no abrupt system shutdowns, etc.
A Quick Recap
SSDs, or Solid-State Drives, are replacing the traditional mechanical hard drives at a very rapid rate because they offer better data writing, effective saving, better data privacy, and, not to forget, much better firmware encryption. Since SSDs are just like any other storage device, they are susceptible to virus attacks, corruption, failure, data loss, and other issues and errors.
I have discussed in-depth the problem where the space on the disk becomes unallocated in this article. Explain the reasons and various ways to fix the unallocated space on the SSD. I have also guided you through a proven solution that is guaranteed to help you recover lost data or partitions from any SSD.
Author Bio:
Lucy J, a veteran voice in the data recovery industry. With more than a decade of experience and knowledge. Lucy now writes blogs and posts on data recovery, data management, and resolving issues and errors for Yodot. Apart from Yodot, her posts and articles regularly get published on various forums and websites.