Table of Content
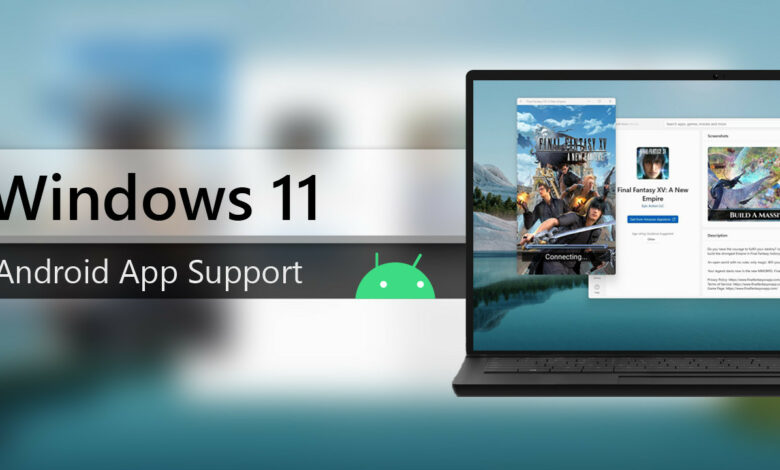
Android apps are top-rated and have become an integral part of our lives. However, not all devices support Android apps, which can be frustrating for users who want to know How to Install Android Apps on a Windows 11 PC. This article, How to Install Android Apps on Windows 11, will guide you through the process.
Understanding Windows 11 Compatibility is the first step towards installing Android apps on your PC. Windows 11 is the latest version of the Windows operating system, and it has several new features and improvements. However, not all PCs are compatible with Windows 11, and you need to check if your device meets the minimum system requirements. Once you have confirmed that your PC is compatible with Windows 11, you can proceed to the next step.
Enabling Virtualization on Your PC is essential for installing Android apps on Windows 11. Virtualization allows you to create a virtual environment on your PC, which is necessary for running Android apps. You can enable virtualization in your PC’s BIOS settings, and this article will provide step-by-step instructions on how to do it. Once you have enabled virtualization, you can proceed to the next step and install Windows Subsystem for Android (WSA).
Read Also: Top 20 Best Remote Desktop Software and Apps
Key Takeaways
- Windows 11 compatibility is essential for installing Android apps on your PC.
- Enabling virtualization is necessary for creating a virtual environment on your PC.
- Installing Windows Subsystem for Android and using Amazon Appstore or sideloading Android apps are the two main methods for installing Android apps on Windows 11.
Understanding Windows 11 Compatibility
Before attempting to install Android apps on Windows 11, it is important to understand the compatibility of the two platforms. Windows 11 is a powerful operating system that supports a wide range of applications, including desktop and web apps. However, not all apps are compatible with Windows 11, and this is especially true for Android apps.
Windows 11 is built on a different architecture than Android, which means that Android apps cannot be installed directly on Windows 11. To run Android apps on Windows 11, you need an emulator that can create a virtual Android environment on your PC.
Several Android emulators are available for Windows 11, including BlueStacks, NoxPlayer, and LDPlayer. These emulators create a virtual Android environment on your PC, allowing you to run Android apps just like you would on an Android device.
It is important to note that not all Android apps will work perfectly on Windows 11. Some apps may have compatibility issues, and others may not work at all. Additionally, some apps may require specific hardware or software configurations to work properly.
Enabling Virtualization on Your PC
To install Android apps on Windows 11, you need to enable virtualization on your PC. This process involves accessing the BIOS or UEFI settings and activating hardware virtualization. Here are the steps you need to follow:
Accessing BIOS or UEFI Settings
- Restart your computer.
- Press the appropriate key to enter the BIOS or UEFI settings. This key varies depending on your PC manufacturer. Standard keys include F2, F10, and Del.
- Once you’re in the BIOS or UEFI settings, look for the virtualization option. This option may be located under the “Advanced” or “Security” tab.
- Enable the virtualization option and save your changes.
Activating Hardware Virtualization
- Open the Windows search bar and type “Turn Windows features on or off”.
- Click on the search result to open the “Windows Features” window.
- Scroll down and locate “Windows Hypervisor Platform” and “Virtual Machine Platform”.
- Check the boxes next to these options to enable them.
- Click “OK” to save your changes.
Installing Windows Subsystem for Android
Windows Subsystem for Android is a feature that allows users to run Android apps on Windows 11. It is a built-in feature that can be activated by following a few simple steps. In this section, we will discuss how to download and configure Windows Subsystem for Android.
Downloading Windows Subsystem for Android
- Open the Microsoft Store on your Windows 11 device.
- Search for “Windows Subsystem for Android” in the search bar.
- Click on the “Get” button to download and install the feature.
Configuring Windows Subsystem for Android
- Open the Start menu and search for “Windows Subsystem for Android.”
- Click on the app to open it.
- Follow the on-screen instructions to complete the setup process.
After completing the setup process, you can now run Android apps on your Windows 11 device. Simply search for the app you want to run in the Windows Subsystem for Android app and click on it to launch it.
Keep in mind that not all Android apps may work on Windows Subsystem for Android. Some apps may require additional configuration or may not be compatible at all. It is recommended to check the app compatibility before attempting to run it on Windows Subsystem for Android.
Using Amazon Appstore
Linking Your Amazon Account
To use Amazon Appstore on Windows 11, the first step is to link your Amazon account to the Appstore. If you don’t have an Amazon account, you will need to create one before proceeding.
- Open the Amazon Appstore app on your Windows 11 device.
- Click on the “Sign In” button located at the top right corner of the screen.
- Enter your Amazon account email and password, and click “Sign In”.
- If you have two-factor authentication enabled on your Amazon account, enter the verification code that is sent to your registered device.
- Your Amazon account is now linked to the Appstore.
Downloading and Installing Apps from Amazon Appstore
- Open the Amazon Appstore app on your Windows 11 device.
- Browse the available apps or use the search bar to find a specific app.
- Click on the app you want to download.
- Click on the “Download” button.
- Wait for the app to download and install automatically.
- Once the installation is complete, you can open the app from the Appstore or from your Windows 11 Start menu.
Keep in mind that not all Android apps are available on Amazon Appstore. However, Amazon Appstore does offer a wide selection of popular apps and games, as well as exclusive deals and discounts for Amazon Prime members.
Sideloading Android Apps
Sideloading Android apps on Windows 11 allows users to run their favorite mobile applications on their desktops. Here are two methods to sideload Android apps on Windows 11.
Enabling Developer Mode
Before sideloading Android apps on Windows 11, users must enable developer mode. To do so, follow these steps:
- Click on the Start menu and select “Settings.”
- Click on “Update & Security” and select “For developers.”
- Select the “Developer mode” option.
Installing Apps Using ADB
- Download the Android SDK Platform-Tools from the official Android website.
- Extract the downloaded ZIP file to a convenient location on your computer.
- Connect your Android device to your computer using a USB cable.
- Open Command Prompt or PowerShell on your computer.
- Navigate to the location where you extracted the Android SDK Platform-Tools using the command prompt.
- Type “adb install [path to APK file]” and press enter.
The above steps will install the APK file on the connected Android device. Users can then access the app on their Windows 11 device using an Android emulator.
Managing Installed Android Apps
Once you have successfully installed an Android app on Windows 11 using an emulator, you may want to manage the apps you have installed. Here are a few tips on how to manage your installed Android apps on Windows 11.
Uninstalling Android Apps
If you want to uninstall an Android app from your Windows 11 computer, you can do so easily. Simply go to the Start menu and find the app you want to uninstall. Right-click on the app and select “Uninstall” from the drop-down menu. You can also uninstall the app from the Settings app by going to “Apps & features” and selecting the app you want to uninstall.
Updating Android Apps
Updating your Android apps on Windows 11 is just as easy as updating them on your Android device. Simply open the Google Play Store app in your emulator and go to the “My apps & games” section. From there, you can see which apps need to be updated and click “Update” to update them.
Organizing Android Apps
If you have a lot of Android apps installed on your Windows 11 computer, you may want to organize them to make them easier to find. You can create folders on your desktop or in the Start menu to group similar apps. To create a folder, right-click on the desktop or Start menu and select “New folder” from the drop-down menu. You can then drag and drop apps into the folder.
Backing Up Android Apps
If you want to back up your Android apps on Windows 11, you can use a backup app like Helium. Helium allows you to back up your apps and data to your computer or cloud storage. Once you have backed up your apps, you can quickly restore them if you ever need to reset your device or switch to a new device.
Troubleshooting Common Issues on How to Install Android Apps on Windows 11
Fixing Installation Errors
Installing Android apps on Windows 11 can sometimes be a tricky process, and users may run into issues during installation. Here are some common installation errors and how to fix them:
- Error message: “App not installed” – This error can occur when the app you are trying to install is not compatible with your version of Windows 11. Check the app’s system requirements before attempting to install it.
- Error message: “Installation failed” – This error can occur due to a variety of reasons, such as insufficient disk space or a corrupted installation file. Try freeing up some space on your hard drive or downloading the installation file again.
- Error message: “Unknown error code during application install” – This error can occur due to a problem with the Google Play Store. Try clearing the cache and data for the Google Play Store app, and then attempt to install the app again.
Resolving Performance Problems
After successfully installing an Android app on Windows 11, you may encounter performance issues. Here are some tips to help resolve common performance problems:
- App crashes frequently – A variety of reasons, such as outdated drivers or conflicting software can cause this. To resolve this, try updating your drivers and closing any unnecessary programs before running the app.
- App runs slowly or freezes – Insufficient system resources can cause this. To fix this, try closing any unnecessary programs and freeing up some memory before running the app.
- App displays incorrectly – This can be caused by compatibility issues between the app and your version of Windows 11. To resolve this, try running the app in compatibility mode or contacting the app developer for support.