How to Screen Record in Windows 10 and Windows 11: A Step-by-Step Guide
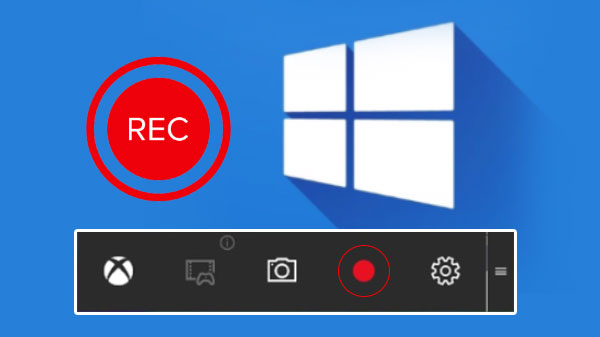
Table of Content
Screen recording is a useful feature that allows users to capture their computer screen and create video tutorials, and presentations, or share their gameplay with others. Windows 10 and Windows 11 both come with built-in screen recording tools that make the process straightforward. In this article, we will discuss how to screen record in Windows 10 and Windows 11.
Understanding Screen Recording Basics is the first step to successfully recording your screen. Screen recording software captures everything that happens on your computer screen, including audio and mouse movements. It is vital to have a clear idea of what you want to record and how you want to use the recording before starting the process. Whether you are recording a tutorial or a gameplay session, having a plan will help you achieve your goals more efficiently.
Using Built-In Screen Recording Tools is the easiest way to screen record in Windows 10 and Windows 11. Both operating systems come with a built-in screen recorder that allows you to capture your screen with just a few clicks. The built-in tools offer basic features such as recording the entire screen or a specific window, adding audio, and adjusting the video quality. However, if you need more advanced features, you may want to consider using third-party screen recording software.
Understanding Screen Recording Basics
Screen recording is a useful feature that allows users to capture their computer screen and create video tutorials, presentations, or even record gameplay. Both Windows 10 and Windows 11 come with built-in screen recording tools that are easy to use.
Screen Record in Windows 10
To start screen record in Windows 10, users can use the built-in Xbox Game Bar. This tool was initially designed for gamers but can also be used for screen recording. To access it, press the Windows key + G. Once the Game Bar is open, click on the “Capture” button to start recording. Users can choose to record the entire screen or select a specific window to record. The Game Bar also allows users to record audio from their microphone and system audio.
Once the recording is complete, users can access the video file in the “Captures” folder in the Videos library.
Screen Record in Windows 11
Windows 11 has an updated screen recording tool called “Capture.” To access it, press the Windows key + Shift + Q.
In the Capture window, users can choose to record the entire screen or select a specific window to record. Users can also choose to record audio from their microphone and system audio.
Once the recording is complete, users can access the video file in the “Captures” folder in the Videos library.
In conclusion, screen recording is a valuable feature that can be used for a variety of purposes. Both Windows 10 and Windows 11 come with built-in screen recording tools that are easy to use.
Using Built-In Screen Recording Tools
Windows 10 and Windows 11 come with a built-in screen recording tool that allows users to capture their screen activity. This tool is easy to use and does not require any additional software installation. In this section, we will discuss how to use the built-in screen recording tools in Windows 10 and Windows 11.
Using Xbox Game Bar in Windows 10
Xbox Game Bar is a built-in tool in Windows 10 that allows users to record their screen activity. Here are the steps to use Xbox Game Bar to record your screen:
- Press the Windows key + G to open the Xbox Game Bar.
- Click on the “Capture” button (or press the Windows key + Alt + R) to start recording.
- To stop recording, click on the “Stop” button in the Xbox Game Bar or press the Windows key + Alt + R again.
Xbox Game Bar also allows users to customize their recording settings, such as recording quality, audio settings, and keyboard shortcuts.
Using Xbox Game Bar in Windows 11
Windows 11 also comes with an Xbox Game Bar, which can be used to record screen activity. Here are the steps to use the Xbox Game Bar in Windows 11:
- Press the Windows key + G to open the Xbox Game Bar.
- Click on the “Record” button (or press the Windows key + Alt + R) to start recording.
- To stop recording, click on the “Stop” button in the Xbox Game Bar or press the Windows key + Alt + R again.
Xbox Game Bar in Windows 11 also allows users to customize their recording settings, including video quality, audio settings, and keyboard shortcuts.
Overall, using the built-in screen recording tools in Windows 10 and Windows 11 is a quick and easy way to capture your screen activity. With Xbox Game Bar, users can customize their recording settings to suit their needs.
Third-Party Screen Recording Software
If the built-in screen recording feature in Windows 10 and Windows 11 does not meet your needs, you can use third-party screen recording software. There are many options available, both free and paid, with varying features and capabilities. This section will discuss some considerations for selecting the right software and provide a brief overview of the installation and setup process.
Selecting the Right Software
When selecting a third-party screen recording software, it is important to consider your specific needs. Some software may offer advanced editing features, while others may focus on simplicity and ease of use. Additionally, some software may have limitations on recording time or resolution.
To help you choose the right software, here are some factors to consider:
- Price: Determine your budget and look for software that fits within it. Keep in mind that some free software may have limitations or watermarks.
- Recording quality: Consider the resolution and frame rate of the software. Higher quality recordings will require more processing power and may result in larger file sizes.
- Editing features: If you plan to edit your recordings, look for software that offers the features you need, such as trimming, adding text, or adding audio.
- Ease of use: Look for software that is user-friendly and has a clear interface. Some software may have a steep learning curve or require technical knowledge.
- Compatibility: Ensure that the software is compatible with your version of Windows.
Installation and Setup
Once you have selected your software, the installation and setup process will vary depending on the software. Generally, you will need to download the software from the developer’s website and follow the installation instructions.
After installation, you will need to configure the software to your preferences. This may include selecting the recording area, adjusting the recording quality, and choosing the audio source. Some software may also allow you to set hotkeys for starting and stopping recordings.
Overall, third-party screen recording software can provide additional features and flexibility for your screen recording needs. By considering your specific needs and selecting the right software, you can ensure a smooth recording experience.
Read Also: How to Maximize Microsoft OneDrive in Windows 11
Recording Your Screen
Screen recording is a useful feature that allows users to capture their computer screen’s contents in real-time. Windows 10 and Windows 11 both have built-in screen recording tools that are easy to use. In this section, we will show you how to record your screen using these tools.
Starting a Recording
To start a screen recording, open the app or window you want to record and press the Windows key + G on your keyboard. This will open the Xbox Game Bar, which has a screen recording feature.
Click on the “Capture” button in the Game Bar and select “Start recording” to begin the recording. You can also use the keyboard shortcut Windows key + Alt + R to start and stop the recording.
Managing Recording Settings
Before starting a recording, you can adjust the recording settings to suit your needs. To do this, go to the Settings app and click on “Gaming.” From there, select “Captures” and you will see various options such as recording quality, audio settings, and more.
You can also use the Game Bar’s settings to customize your recording. Click on the “Settings” icon in the Game Bar and select “Recordings.” Here, you can change the recording quality, audio settings, and more.
Saving and Editing Your Recording
Once you have finished recording, you can save the video to your computer. To do this, open the Game Bar and click on the “Show all captures” button. From there, you can select the recording you want to save and click on the “Open folder” button to access the file.
If you want to edit the recording, you can use Windows’ built-in video editor. Right-click on the recording file and select “Edit with Photos.” This will open the video editor, where you can trim the recording, add text, and more.
In conclusion, screen recording is a useful tool that can help you create tutorials, presentations, and more. With Windows 10 and Windows 11, you can easily record your screen and customize the recording settings to suit your needs.
Troubleshooting Common Issues
If you encounter any problems while screen recording in Windows 10 or Windows 11, there are several common issues you can troubleshoot.
Audio Problems
If the audio in your screen recording is not working, there may be a problem with your microphone or sound settings. Make sure your microphone is enabled and selected as the default recording device in your sound settings. You can also try adjusting the microphone volume and checking for any mute settings.
Video Quality Issues
If the video quality in your screen recording is poor, there may be a problem with your screen resolution or graphics card. Make sure your screen resolution is set to the recommended level and check for any updates for your graphics card drivers. You can also try reducing the size of your recording window or decreasing the recording quality.
Software Conflicts
If you are experiencing software conflicts while screen recording, there may be a conflict with other programs running on your computer. Try closing any unnecessary programs and disabling any antivirus or firewall software temporarily. You can also try recording in safe mode to avoid any conflicts with other software.
Best Practices for Screen Recording
When it comes to screen recording, there are a few best practices that can help ensure a smooth and successful recording session. Here are some tips to keep in mind:
1. Plan ahead
Before starting a screen recording session, it’s important to plan ahead. This includes deciding on the content to be recorded, selecting the appropriate software, and ensuring that all necessary settings are configured correctly.
2. Use a high-quality microphone
For screen recordings that include audio, using a high-quality microphone is essential. This can help ensure that the audio is clear and easy to understand, and can prevent issues such as background noise or distortion.
3. Keep the recording area clutter-free
To ensure that the focus remains on the content being recorded, it’s important to keep the recording area clutter-free. This includes removing any unnecessary items from the screen, as well as minimizing any background noise or distractions.
4. Test the recording before starting
Before starting a screen recording session, it’s a good idea to test the recording software and settings to ensure that everything is working correctly. This can help prevent issues such as audio or video glitches, and can ensure that the final recording is of high quality.
Advanced Screen Recording Techniques
For users who want to take their screen recording to the next level, Windows 10 and Windows 11 offer several advanced options.
Recording with Audio
By default, Windows 10 and Windows 11 do not record audio when you use the built-in screen recording feature. However, users can enable audio recording by selecting the “Record audio” option in the Game Bar settings. This will allow users to capture system audio, microphone audio, or both.
Recording Specific Windows
If you only want to record a specific window or application, Windows 10 and Windows 11 offer the option to do so. Simply click on the “Select a window” button in the Game Bar and choose the window you want to record. This is a useful feature for users who want to create tutorials or demos without showing their entire desktop.
Using Hotkeys
Windows 10 and Windows 11 allow users to start and stop screen recordings using hotkeys. By default, the hotkey to start and stop recording is “Windows + Alt + R”. Users can customize this hotkey by going to the Game Bar settings and selecting “Keyboard shortcuts”. This is a convenient feature for users who want to quickly start and stop recordings without having to navigate through menus.
Editing Recordings
After recording, users can edit their videos using the built-in Photos app. The Photos app offers basic editing tools such as trimming, adding text, and applying filters. For users who need more advanced editing options, we recommend using third-party video editing software.
Utilizing these advanced screen recording techniques, users can create high-quality recordings with ease.