Table of Content
When setting up a Windows desktop computer or laptop, the CPU fan issue is a common error message. Typically, the alert appears after a computer has shut down due to overheating. This can happen when the fan (or fans) is unable to adequately cool the hardware. Although inconvenient, the CPU error warning and forced shutdown show that the computer’s safeguards are in place. If the fans aren’t working properly and the computer continues to overheat, a variety of hardware components may be permanently damaged.
There are several methods for determining the source of overheating and the resultant error messages, as well as for correcting them.
How Does the CPU Fan Error Show Up?
On a Windows PC, the CPU fan issue usually shows during the boot-up or start-up procedure; it does not display during normal Windows usage. The text of the error message is usually one of the following:
- “CPU Fan Failed!” says the error message.
- “CPU Fan Error”: What Causes It? What Causes CPU Fan Errors?
Physical damage to the fan, wrong settings, or external factors causing the computer to overheat and force the fan to run at extremely high speeds are the most common causes of a CPU fan error on startup.
CPU fan issues can also be caused by dust or other items clogging the device’s air vents.
How to Troubleshoot a CPU Fan Error
Because CPU fan errors can be caused by both hardware and software issues, the solutions are as varied as the errors themselves and include verifying specific settings as well as the internal CPU fan.
To avoid CPU overheating and error signals, follow these guidelines.
1. Change the location of your computer.
Even if your computer’s fan is working hard, leaving it in a place with a lot of heat or sunlight can cause it to overheat and shut down. Consider moving your computer to a cooler room or ensuring that it is never exposed to direct sunlight during the day.
2. Stop overclocking your computer.
Overclocking causes a significant increase in system heat that is unmanageable by the basic fans. Circuits may be damaged, resulting in frequent shutdowns and overheating issues.
3. Keep your PC at a comfortable temperature.
To clean the air vents, remove the brush from your vacuum cleaner and use it at full power to suction out any dust and dirt. Alternatively, blast the dust away using an airgun or bottled air.
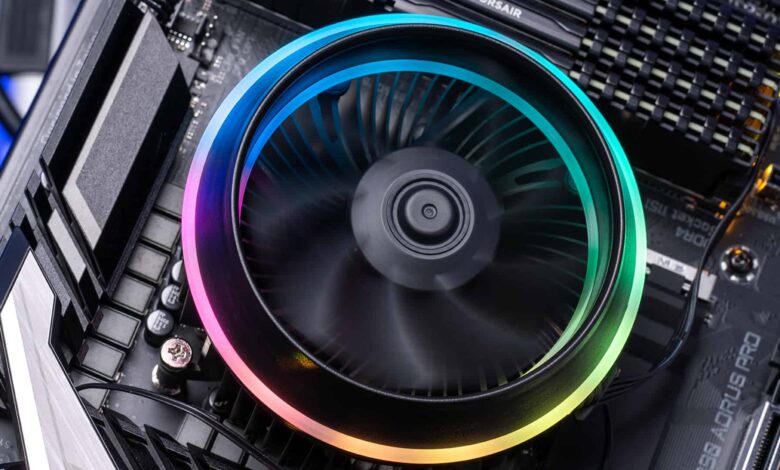
4. Make sure the CPU fans are clean.
Turn your computer off, unplug it from the power source, then open up the casing for this step.
With an air gun or canned air, clean the interior and remove dust once it’s been opened.
Important: Do not spray any cleaning agents onto any parts, as this might cause serious damage to a number of components. Many devices, like the Microsoft Surface line, are not designed to be opened, and doing so may void the warranty or cause irreversible harm.
If you’re unsure, see the official support manual for your device or contact customer care.
5. Examine your computer’s fan.
While your computer is open, physically inspect the fans to ensure they haven’t come loose or fallen out of place.
With a screwdriver or adhesive, you should be able to secure your fans back into position, depending on the type.
Essential: Before inspecting anything inside an electrical device, make sure it is totally turned off and removed from any power sources. When turning your computer off, remember to select Shut Down rather than Sleep.
6. Examine the placement of your CPU fan.
If you’re installing the CPU fan yourself, double-check that it’s in the right place. It should be connected to the motherboard’s CPU header. The fan may operate when the computer is turned on if it’s attached somewhere else, but it won’t be cooling the CPU effectively, which is what it’s supposed to do.
TIP: The CPU header will most likely be labeled “CPU Fan,” but even if it isn’t, the three holes for the fan’s three-pronged plug make it easy to find.
7. Consider using a different CPU fan header.
If your motherboard has multiple CPU fan headers, try plugging the fan into a different slot. This can help with the CPU fan problem.
8. In BIOS, look at the CPU fan settings.
It can be used to debug technical issues and double-check that everything is working properly.
- Select Advanced Settings > Hardware Monitor > CPU Fan from the BIOS menu.
- Active Heat Sink and Fan Duct with Fan should be enabled.
- Passive Heat Sink and Fan Duct without Fan should be disabled.
- Exit BIOS after saving your changes.
TIP: When you see the initial CPU fault warning, you’ll often be requested to press F1. When this notice appears, pressing F1 will also bring up BIOS.
Make a BIOS setting change.
If your CPU fan is working properly and your computer isn’t overheating or running too hot, changing the BIOS option in step 8 will skip the CPU fan problem notice and get your device back up and running.
To do so, go to BIOS and select Monitor > Fan Speed Monitor > N/A > Ignore > Exit > Save Changes from the menu.
Caution: This may impair your computer’s ability to detect future CPU fan and overheating issues. This should only be done if you are certain that your CPU fan is functioning properly and that you can measure your laptop’s temperature.
The CPU fan should be replaced.
If none of the previous methods work, it’s possible that your fan is simply broken and has to be replaced.
The repair of the fan may be covered under your computer’s warranty. If you bought the fan separately, it might come with its own warranty that you can utilize to acquire a replacement part for free or at a reduced price.
More Information For You: How to Choose a Computer Repair Shop?